A first etching
I’ve been itching to try my hand at etching for quite some time and last week had an opportunity to do so with fellow artists Andy Abrams, Jane Evans, Aimee Jones, and Ann Lewis (1). For a year or so, we have been meeting up in Conwy on a monthly basis to chat about printmaking over a pint, and latterly, we have begun a practical exchange of practice. On the first occasion we each made an intaglio print using tetra pack as a base plate, and last week we had a go at etching. We were led in this by Aimee and took advantage of Andy’s wonderful studio in the Conwy Valley. As etching was either completely new to or long-forgotten by all but Aimee, we started with basics — degreasing the plate (on the day, aluminium).
Etching is similar in some respects to drypoint in that both techniques involve making marks into the surface of a plate and it is these marks below the surface of the plate and not on the surface of the plate that prints. In this way, both techniques differ from relief printmaking processes such as linocut and wood engraving. They differ also from themselves in that in drypoint the tool (most frequently an etching needle) physically scores the surface of a plate to create a mark, whereas in etching the marks are etched into (‘bitten’ into) the plate by a chemical reaction (i.e. when the plate is dipped into copper sulphate solution or some such mordant). To protect the plate from being bitten into uniformly, the plate is covered with a ‘ground’. Etching needles (or anything else that can work through the ground) are then used to draw through it to the surface of the plate. Where the metal is exposed through this drawing, it is bitten into by the copper sulphate solution and a mark forms in the plate; where it is still covered, the solution has no effect and leaves no mark. It is important therefore to ensure that the solution cannot get under the ground, hence step one. Degrease the plate. This Aimee did by rubbing them with a mixture of whiting (ground chalk) and soy sauce. She then rinsed off the degreasing compound under a tap (checking that it ran clean off the plate), dried the plates with newsprint and applied the ground — B.I.G.

Degreasing the plate with whiting and soy sauce.
B.I.G. was developed Andrew Baldwin as a non-toxic alternative to traditional ground. It can be worked soft (i.e. wet) and then hardened off before it is dipped into the chemical solution, or worked hard from the outset. We did the latter, rolling a thin layer of ground onto the plate, and then baking it for 6 minutes in an oven set to 135C. B.I.G. comes as either a black or a red compound and I was glad that the one that Aimee had brought with her was red as this made it easier to see the pencil marks that we would later trace onto the hardened surface.

Oven ready. Plates prepped with B.I.G and ready to bake
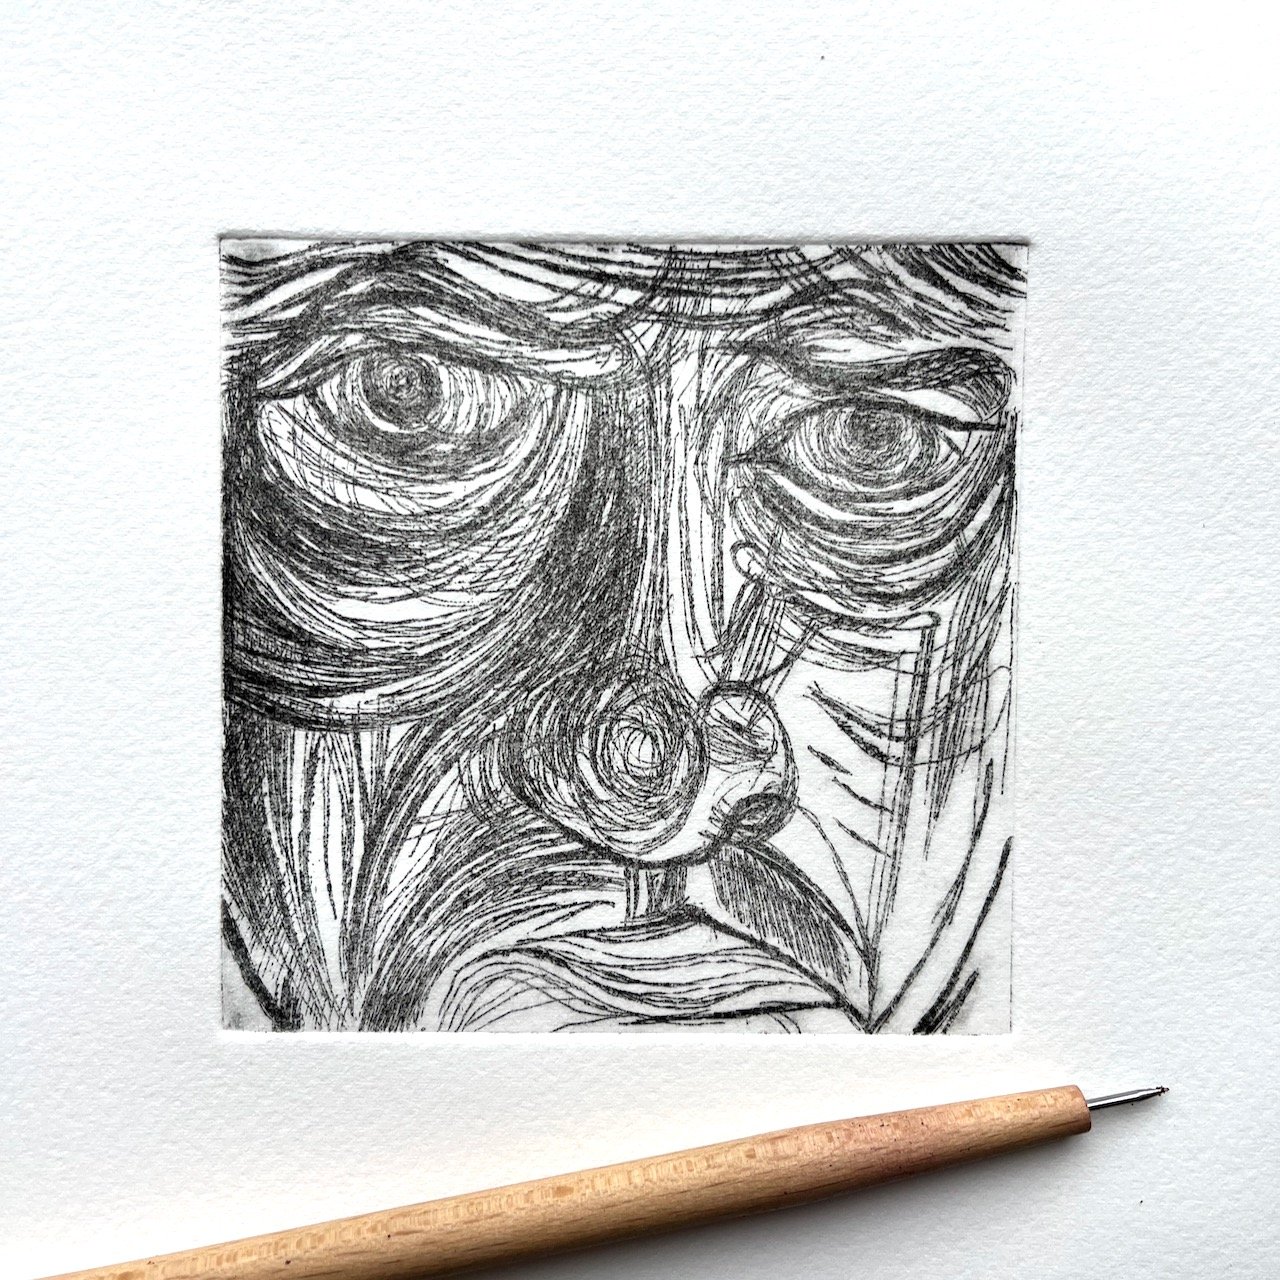
For this, my first attempt at etching, I chose to work on a detail of face which I had drawn some time back and which I hoped would provide a good opportunity to explore line work — something that I have found myself to be doing more and more of in my linocuts. I traced the detail and then transferred it to the ground and began ‘drawing’ through the ground to the surface of the plate with an etching needle. This was a joy: I’ve worked with drypoint in the past and found scoring into the metal to be hard work on the fingers and hand and, in comparison, the ground was relatively easy to work. Tilling, rather than digging. All in all, it took something in the order of 90 to 120 minutes to prepare my face for its bath.
To etch our work, we dipped our plates into copper sulphate solution and left them there for about 15 mins — agitating the surface from time to time with a feather to remove bubbles. Andrew Baldwin recommends a solution made to a density of 38 baumé. Not knowing what this means, I asked Aimee how ours was made up and also looked online for a few recipes. The folk at Handprinted suggest making up a solution in a plastic container with 1 litre of warm water into which is dissolved 100g of cooking salt prior to adding 100g of copper sulphate crystals (this is the mix that we used). Jenny Gunning (at Ironbridge Fine Arts) suggests a weaker solution for aluminum (and also for zinc): 12.5g salt and 50g copper sulphate to a litre of water. For steel (and again also zinc) she advises a stronger solution made of 200g salt and 200g copper sulphate to 1 litre of water. Both Jenny Gunning and Handprinted recommend wearing a mask and gloves when making up and handling the solution, and they both warn against pouring the solution down the sink as it is harmful to aquatic life. The solution can be reused and can be disposed of by letting it evaporate over time into a powder which can then safely be binned.

Etching the plates in copper sulphate solution
When the 15 mins was up, and the solution had done its work of eating into the exposed parts of the plate, we removed the plates and cleaned the remaining ground from them with a sponge and a non-toxic paint and varnish remover (Andrew Baldwin suggests Home Strip). It was at this point that we got to see for the first time the marks that we had etched into the plate. A lovely moment.

My etched plate
We then dried our plates and inked up — not, as I’m used to doing, with a roller, but with mount board and scrim. First, we smeared ink over the surface of the whole plate with mountboard, and then slowly worked the plate all over in small circular motions with scrunched up scrim to force the ink down into the incised marks and to wipe it clear of the surface. This finger-aching work took me a good while to do. Some of us also used cotton buds to further clean the plate and to add highlights. I chose not to do this as my experience of inking intaglio plates in the past had resulted in me cleaning the surface so much that I took ink from the marks and was left with faint prints. I didn’t want another faint print.
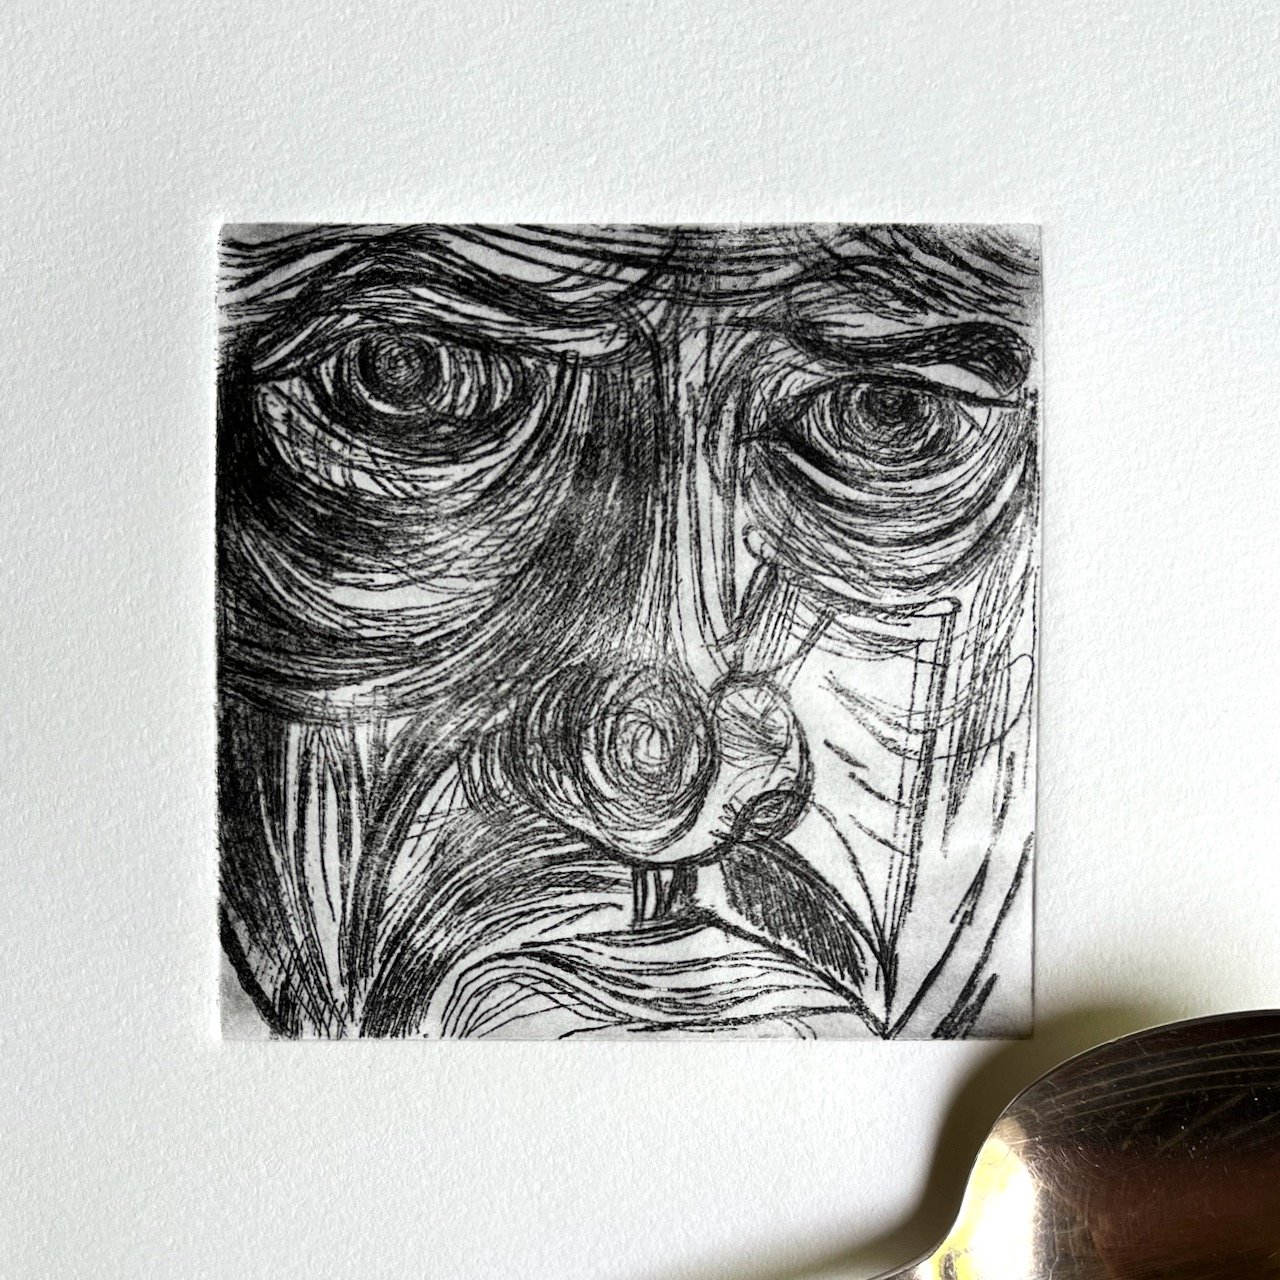
One by one, we then pressed our prints on Andy’s etching press, using paper we had previously soaked for twenty minutes and then dried to a damp matt state between sheets of blotting paper. I was a little disappointed with my print when it came off the press. I liked the line work, but once again it struck me as faint — particularly when compared with everyone else’s work. What, I wondered was I doing wrong? Lines not deep enough? Same old problem of wiping out the ink?
The proof. Faint
That said, I was very pleased to have had an insight into the process and pleased to see my work alongside everyone else’s when we made a one-off group print. I headed home after an enjoyable day with a keen desire to try pulling more prints from my plate.

A print combining everyone’s work. Left-right, top-bottom: Andy, me, Aimee, Jane, Ann
Which I did — albeit with a different ink and with my spoon and not a press.
We had used Hawthorn Stay Open ink in the studio — an ink that I have used a good deal in the past and with good results for both linocuts and wood engravings. I wondered though if it was the ink, rather than my too zealous wiping of the plate that had left me with a pale print, so back at home I tried an ink expressly made for etching: Cranfield’s traditional etching ink. The tone I used is called ‘Bone black’; fitting, given the anguish in my face.
Owing to the amount of pressure that is required to force the receiving paper into the incisions of an etched plate and therein to transfer ink to paper, it is generally held that an etching press is a pre-requisite for etching and for intaglio in general. One of the essentials, as Lumsden puts it — noting that it is the lack of a press that ‘prevents many at trying their hands at engraving plates’. Such a lack had indeed held me back from doing so, and being again reduced to my spoon (albeit with a new ink), I was fully prepared to be disappointed with the quality of any print that I might achieve with spoon alone.
I was pleasantly surprised by the result (see below). Notwithstanding that the print is small (10 x 10 cm), and notwithstanding that it was heavy work on the hand to print, the print has a good quality of line and this I put down to the ink. It would be hard, I’m sure, to work a larger piece with a spoon alone, but having achieved what I feel is a good result has given me the spur to do more etchings. I have bought some zinc plates, some B.I.G., and am ready to go.
For the care of the land
10 x 10 cm aluminium plate etching, pressed with a silver spoon and printed with Cranfield Bone Black Traditional Etching Ink on 250 gsm Somerset Satin paper.
Postscript
I showed my etching to four people the other day. None of them particularly liked it. ‘You do like those swirly lines, don’t you.’
I put the etching in a cheap frame and two days later showed it to them again. They all liked it. ‘O my god — I’d buy that.’, said one.
I wonder what this says about how we perceive art.
Footnote
Jane, Aimee, Ann, Andy, and I are a relaxed bunch — disparate in technique and subject matter, but connected in part by location and in part by a love of printmaking. Ann works predominantly in reduction linocut and is well-know both for her landscapes and her work as past President of the Royal Cambrian Academy. Jane is known for her gyotaku prints of fish and other creatures of the deep and has recently begun working with lino. Aimee works with intaglio processes and dry media and is particularly drawn to corvids. Andy draws inspiration from the Carneddau and works with grey tone in photogravure and linocut.
Andy Abram: https://andyabram.co.uk
Jane Evans: https://gyotakugifts.co.uk
Aimee Jones: https://www.aimeejonesartist.co.uk
Ann Lewis, RCA: https://www.annlewis.co.uk